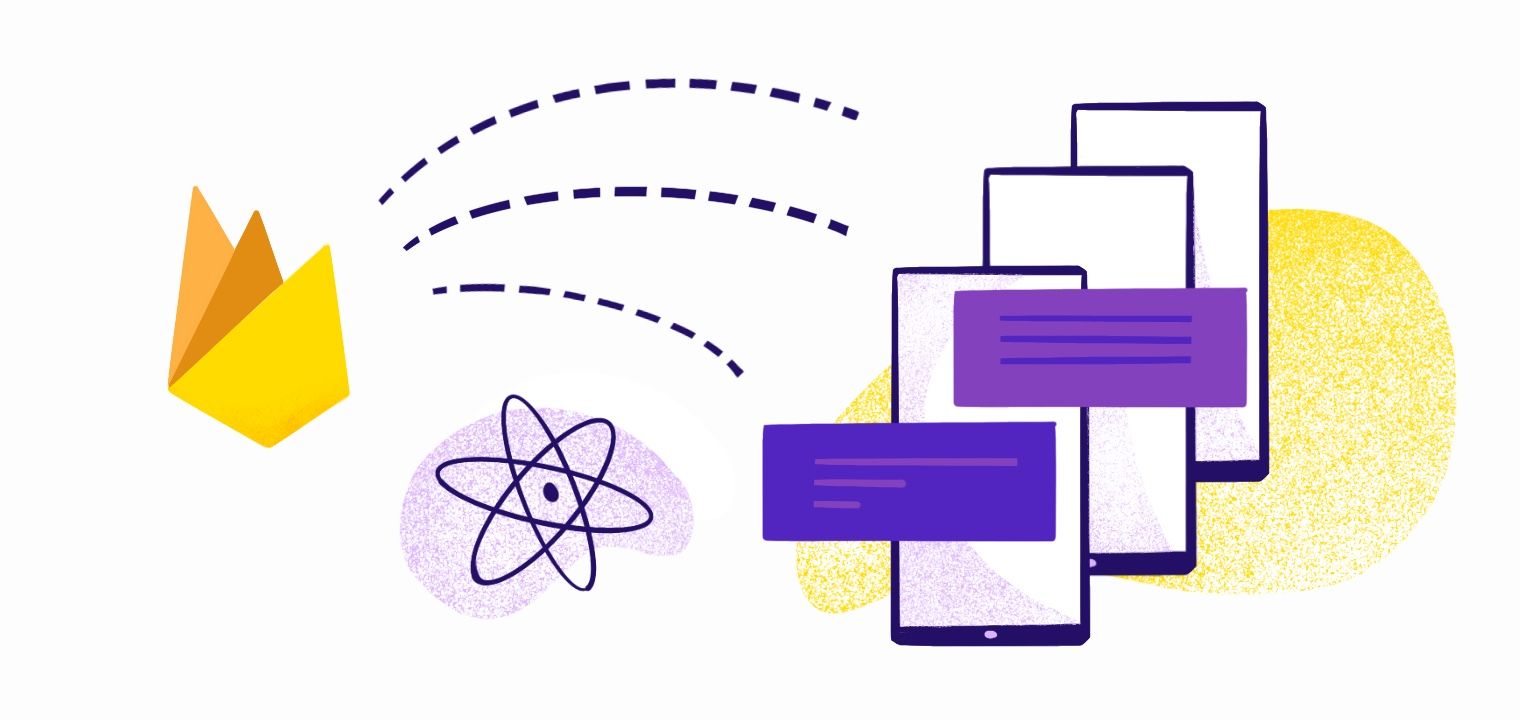
Developing mobile and web applications from scratch is an arduous process. Fortunately, developers no longer need to build applications from square one, thanks to open-source packages and code functionalities. Cloud service providers also have platforms that make it easy to quickly create and host applications for web, iOS, and Android apps.
In-app functionality is important, but web app notifications are crucial for returning users to your app. In-app and push notifications typically require a lot of development resources, but open-source tools make it much more manageable. Firebase Cloud Messaging is a cost-free service, which makes it an attractive option for developers.
Firebase is one of the best tools for creating React Native push notifications. In this guide, we’ll explain why Firebase is such a powerful tool for developers and share the step-by-step process of quickly creating push notifications with Firebase.
Introduction to Push Notifications
Push notifications are a powerful tool for engaging users, allowing you to send messages directly to their devices even when your app is not running. These notifications are handled by services such as Firebase Cloud Messaging (FCM) and Apple Push Notification Service (APNS), which facilitate the delivery of messages from your server to the user's device.
There are two main types of notifications: Remote Push Notifications and Local Notifications.
What is Firebase?
Firebase Cloud Messaging
Firebase is a Google application development platform. It offers a host of built-in, integration-ready features and functionalities, allowing developers to create application backends quickly.
Firebase comes with several features for:
- Analytics
- Remote configurations
- Social logins
- Performance monitoring
- Email authentication
- Ad-Mob
- Cloud messaging
Firebase offers native integration with both Android and iOS platforms, facilitating seamless device-device communication.
Think of Firebase as a suite of tools for expanding your user base, adding more functionalities, and increasing retention. Firebase is one of the top six platforms in terms of market share, with over 42,000 documented customers and a 2.05% market share.
Firebase supports over three million apps with helpful features like:
- A real-time NoSQL cloud database
- Ready-made libraries for user authentication with passwords, phone numbers, or platforms like Google and Facebook
- Fast and secure hosting for web apps
- Machine learning features, thanks to the Firebase ML Kit
- Analytics that tell you how users behave
- Crash reports
Most Firebase features work in real-time, giving you up-to-the-moment information on user behavior, errors, and overall app performance. Plus, it supports both iOS and Android devices, so you don’t have to use multiple tools or platforms to send push notifications.
Without Firebase, developers would have to spend countless hours building apps. Opting for a solution like Firebase allows you to scale to handle a large number of apps, users, and loads without performance issues.
Why Firebase?

Developers at work
Messaging and notification features enhance app user engagement. If you're looking for reliable mobile push notification software to implement push notifications without hassle, go with Firebase.
Developers use Firebase for many things. For example, the Firebase SDK is great for authentication, while the Firebase Firestore is used over the Realtime Database.
Firebase has loads of features, but Firebase Cloud Messaging (FCM) is especially helpful for developers implementing React Native push notifications. With FCM, developers can implement simultaneously across multiple platforms. Firebase provides a simple JavaScript API, making it easy to implement push notifications for both Android and iOS platforms.
It supports iOS, Android, web, Unity, and C++ setups. Developers use Firebase to manually trigger messages with CRON jobs or user interaction using cloud functions for remote push notifications.
FCM can also:
- Send notifications or data messages to users
- Segment users and send different messages to unique user groups
- Implement Toast messages and other acknowledgment notifications
Of course, you still need the proper setup and knowledge to leverage FCM. To send a message using FCM, you need two things:
- An application server or cloud functions environment for Firebase to send messages.
- A platform-specific client application to receive messages with components for each platform.
As long as you have these two things, it’s easy to set up local, remote, test, and native push notifications. This setup is much easier than managing push notifications without a programming platform, saving your team a lot of time.
Push Notifications: React Native + FCM
React Native
React Native is a library maintained by Facebook that developers use to build front-end applications across different platforms. You can combine React Native with Firebase’s back-end-as-a-service solution to create React Native Firebase. This is a combination tool for building cross-platform applications in just a few steps—and less hassle.
To handle device tokens and permissions, developers need to import messaging from '@react-native-firebase/messaging' and use await messaging.
Follow these steps to integrate push notifications in React applications using FCM.
Step 1: Create a New Firebase Project
Go to the Firebase console and create a new project. Follow the prompts and modify them according to your needs. You can initiate a new Firebase project with three simple steps.
When the app launches, it retrieves device tokens for notification delivery, ensuring proper communication with Firebase and APNs.
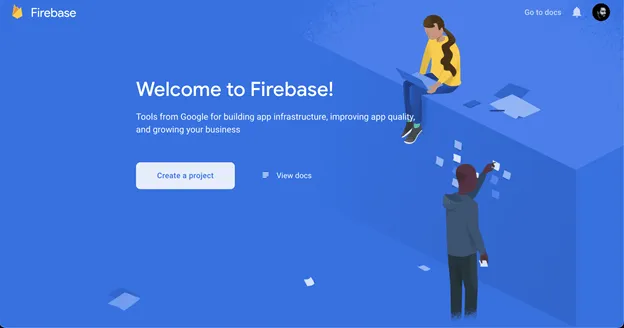
Firebase welcome screen
Log into Firebase and click "Create a project."
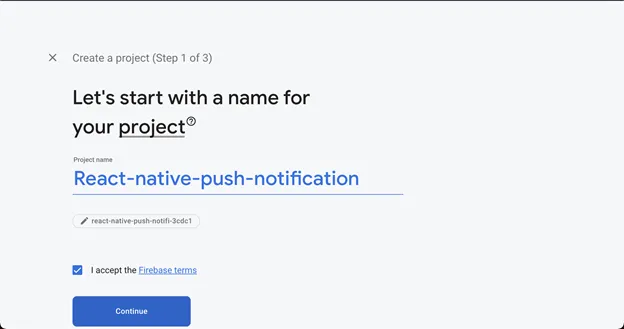
Name your project in Firebase
Choose a name for your project, accept the Firebase terms, and click "Continue."
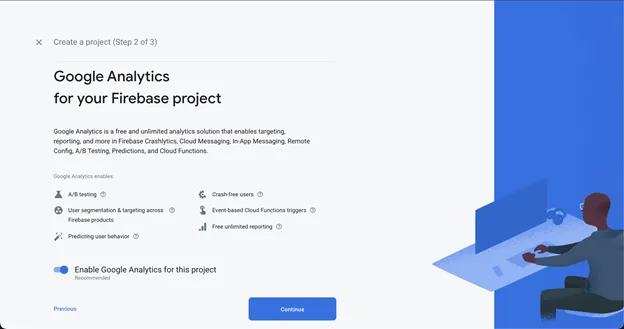
Google Analytics for your Firebase project
In the second step, you can choose to enable or disable Google Analytics for the project.
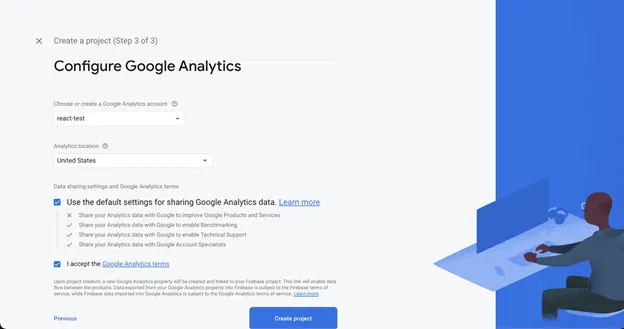
Configuring Google Analytics in Firebase
The final step is to select a Google Analytics account, link it with the project, select your settings, and accept the terms. Then, click "Create project."
Step 2: Create React Native App
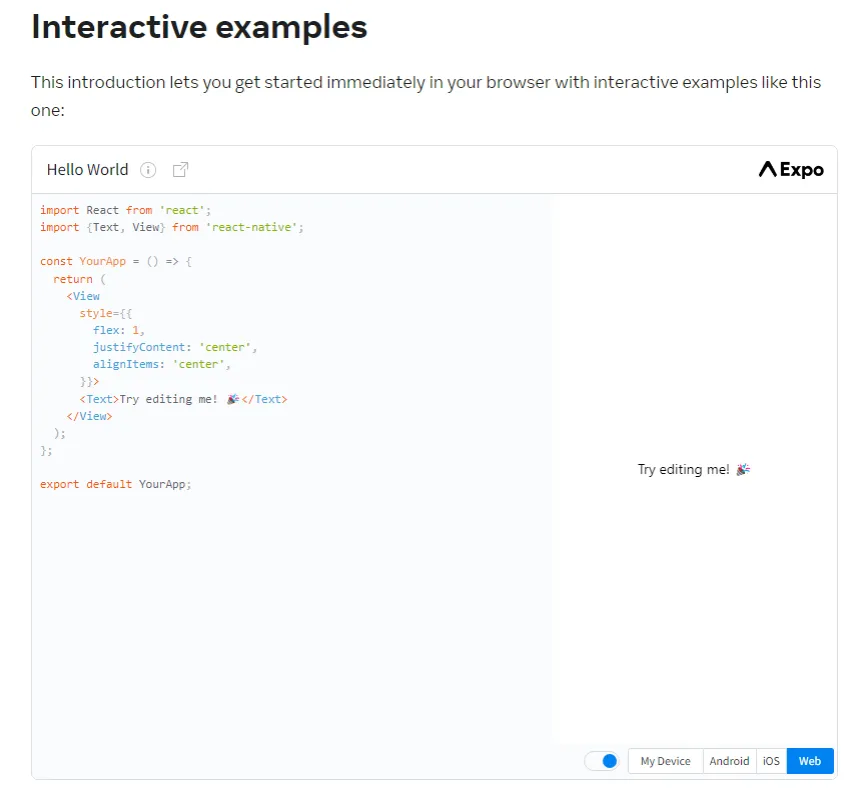
Interactive examples
Create a new React Native app according to the React documentation.
$ react-native init pushNotifExample
You can run the Android application with the following code snippet:
$ react-native run-android
Step 3: Create the Push Notification Dependency
You can use multiple packages to add push notification dependency to your React application. react-native-firebase is a popular package that can add all Firebase functionalities to React applications.
Developers can use const token to retrieve and manage device tokens for push notifications.
Here, we’re using the react-native-push-notification package, which only deals with the push notification functionality. You can get the package using Node Package Manager (npm) or Yarn with the following snippet (from ).
For npm:
$ npm install --save react-native-push-notification
For yarn:
yarn add react-native-push-notification
Step 4: Register Your Application
Register your Android or iOS application in the Firebase dashboard. In this example, we'll implement push notifications for Android apps.
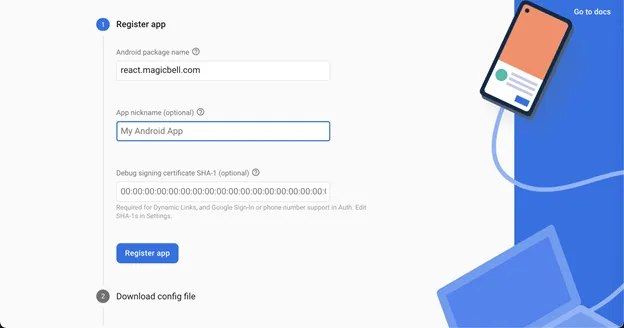
Register your app in Firebase
Register the Android application and give it a name.
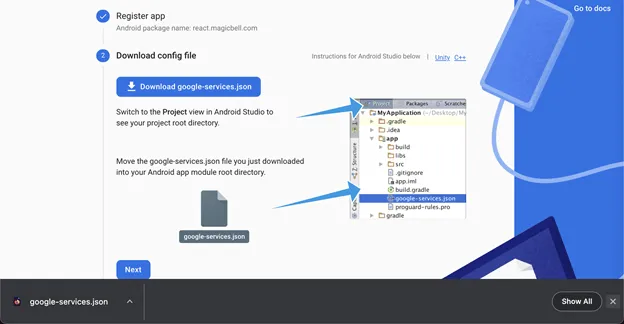
Download the config file in Firebase
Download the google-services.json file and place it in the root directory of your application module.
Use the following code from the Firebase documentation for the project-level build.gradle (<project>/build.gradle):
buildscript {
repositories {
// Check that you have the following line (if not, add it):
google()  // Google's Maven repository
}
dependencies {
...
// Add this line
classpath 'com.google.gms:google-services:4.3.8'
}
}
allprojects {
...
repositories {
// Check that you have the following line (if not, add it):
google()  // Google's Maven repository
...
}
}
Next, create the application level build.gradle (<project>/<app-module>/build.gradle) with this code snippet from the Firebase documentation:
apply plugin: 'com.android.application'
// Add this line
apply plugin: 'com.google.gms.google-services'
dependencies {
// Import the Firebase BoM
implementation platform('com.google.firebase:firebase-bom:28.2.1')
// Add the dependencies for the desired Firebase products
// https://firebase.google.com/docs/android/setup#available-libraries
}
Add the following code to AndroidManifest.xml (from GitHub):
<uses-permission android:name="android.permission.WAKE_LOCK" />
<permission
android:name="${applicationId}.permission.C2D_MESSAGE"
android:protectionLevel="signature" />
<uses-permission android:name="${applicationId}.permission.C2D_MESSAGE" />
<uses-permission android:name="android.permission.VIBRATE" />
<uses-permission android:name="android.permission.RECEIVE_BOOT_COMPLETED"/>
<application .......>
<meta-data  android:name="com.dieam.reactnativepushnotification.notification_channel_name"
android:value="YOUR NOTIFICATION CHANNEL NAME"/>
<meta-data  android:name="com.dieam.reactnativepushnotification.notification_channel_description"
android:value="YOUR NOTIFICATION CHANNEL DESCRIPTION"/>
<meta-data  android:name="com.dieam.reactnativepushnotification.notification_color"
android:resource="@android:color/white"/>
<receiver
android:name="com.google.android.gms.gcm.GcmReceiver"
android:exported="true"
android:permission="com.google.android.c2dm.permission.SEND" >
<intent-filter>
<action android:name="com.google.android.c2dm.intent.RECEIVE" />
<category android:name="${applicationId}" />
</intent-filter>
</receiver>
<receiver android:name="com.dieam.reactnativepushnotification.modules.RNPushNotificationPublisher" />
<receiver android:name="com.dieam.reactnativepushnotification.modules.RNPushNotificationBootEventReceiver">
<intent-filter>
<action android:name="android.intent.action.BOOT_COMPLETED" />
</intent-filter>
</receiver>
<service android:name="com.dieam.reactnativepushnotification.modules.RNPushNotificationRegistrationService"/>
<service
android:name="com.dieam.reactnativepushnotification.modules.RNPushNotificationListenerService"
android:exported="false" >
<intent-filter>
<action android:name="com.google.firebase.MESSAGING_EVENT" />
</intent-filter>
</service>
... </application>
Sync the code.
Step 5: Implement Push Functionality
Use the following code (from GitHub) to call PushNotification.configure at the start of the app. It needs to be in a separate JS file and imported to App.js.
import React, { Component } from 'react';
import PushNotification from 'react-native-push-notification';
// var PushNotification = require("react-native-push-notification");
export default class PushController extends Component {
  componentDidMount() {
    PushNotification.configure({
      // (optional) Called when Token is generated (iOS and Android)
      onRegister: function (token) {
        console.log('TOKEN:', token);
      },
      // (required) Called when a remote or local notification is opened or received
      onNotification: function (notification) {
        console.log('NOTIFICATION:', notification);
        // process the notification here
        // required on iOS only
        notification.finish(PushNotificationIOS.FetchResult.NoData);
      },
      // Android only
      senderID: '1090501687137',
      // iOS only
      permissions: {
        alert: true,
        badge: true,
        sound: true,
      },
      popInitialNotification: true,
      requestPermissions: true,
    });
  }
  render() {
    return null;
  }
}
The content of the App.js file should look like this:
import React, { Fragment } from 'react';
import PushController from './PushController';
import { SafeAreaView, StyleSheet, ScrollView, View, Text, StatusBar, FlatList} from 'react-native';
import {Header, LearnMoreLinks, Colors, DebugInstructions, ReloadInstructions } from 'react-native/Libraries/NewAppScreen';
// Dummy data for list, we'll replace this with data received from push
let pushData = [
{
title: "First push",
message: "First push message"
},
{
title: "Second push",
message: "Second push message"
}
]
_renderItem = ({ item }) => (
<View key={item.title}>
<Text style={styles.title}>{item.title}</Text>
<Text style={styles.message}>{item.message}</Text>
</View>
);
const App = () => {
return (
<Fragment>
<StatusBar barStyle="dark-content" />
<SafeAreaView>
<ScrollView
contentInsetAdjustmentBehavior="automatic"
style={styles.scrollView}>
<Header />
<View style={styles.listHeader}>
<Text>Push Notifications</Text>
</View>
<View style={styles.body}>
<FlatList
data={pushData}
renderItem={(item ) => this._renderItem(item)}
keyExtractor={(item ) => item.title}
/>
{/* <LearnMoreLinks /> */}
</View>
</ScrollView>
</SafeAreaView>
<PushController/>
</Fragment>
);
};
const styles = StyleSheet.create({
scrollView: {backgroundColor: Colors.lighter,},
listHeader:{ backgroundColor: '#eee', color: "#222", height: 44, padding: 12},
title:{fontSize: 18, fontWeight: 'bold', paddingTop: 10},
message:{ fontSize: 14, paddingBottom: 15, borderBottomColor: "#ccc", borderBottomWidth: 1},
engine: { position: 'absolute', right: 0,},
body: { backgroundColor: Colors.white, paddingHorizontal: 20, paddingVertical: 10, },
sectionContainer: { marginTop: 32, paddingHorizontal: 24, },
sectionTitle: { fontSize: 24, fontWeight: '600', color: Colors.black},
sectionDescription: { marginTop: 8, fontSize: 18, fontWeight: '400', color: Colors.dark,},
highlight: { fontWeight: '700'},
footer: { color: Colors.dark, fontSize: 12, fontWeight: '600', padding: 4, paddingRight: 12, textAlign: 'right',},
});
export default App;
You can access the Sender ID and other authentication details under the Cloud Messaging section in your project settings.
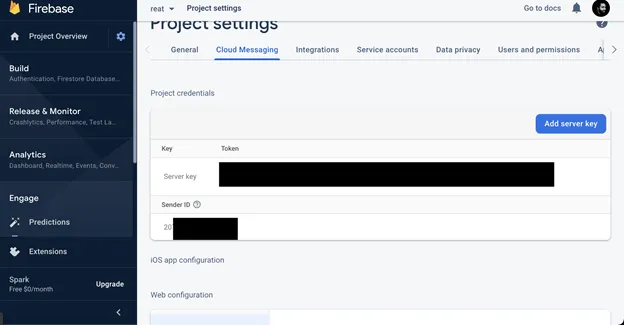
Firebase project settings
Step 6: Run the Android App
Run your Android application with the following code snippet:
$ react-native run-android
Step 7: Send Push Notifications from FCM
Go to the FCM dashboard to start sending push notifications. You can find this in Engage>Cloud Messaging.
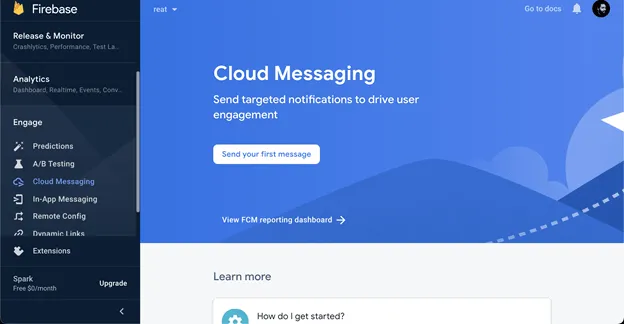
Cloud Messaging in Firebase
Follow the prompts to compose and select targets for the push notification.
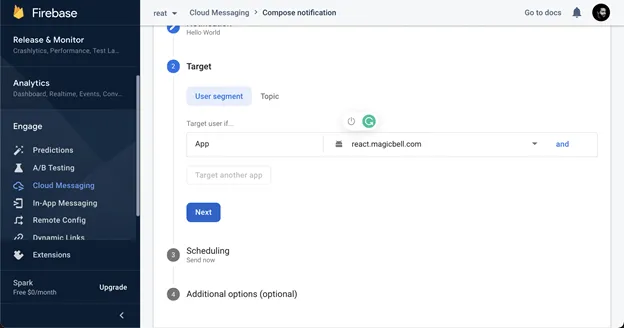
Selecting targets for your push notification in Firebase
Select the targets you need.
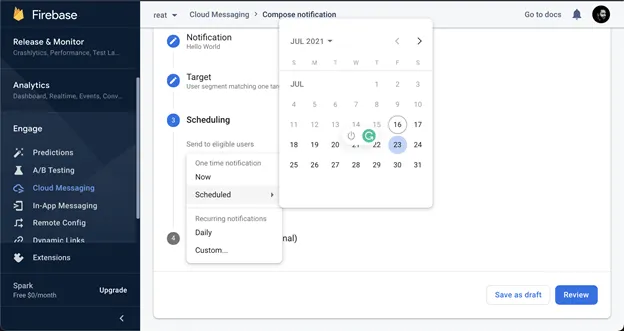
Scheduling push notifications in Firebase
You can send the message now or schedule it for another time.

Additional push notification settings in Firebase
You can modify additional options based on your requirements, if needed.
Once you’re done, click “Review.” Click “Publish” in the popup to send messages based on your settings.
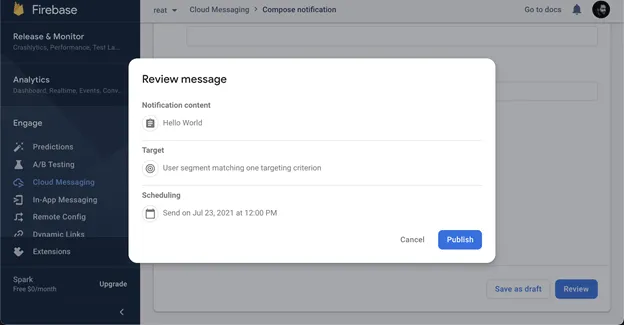
Review and publish your push notification in Firebase
The system will send the push notifications based on the schedule you provided and your target criteria.
Step 8: Request notification permissions
You’ve laid the foundation for sending push notifications, but users have a say in whether they receive them.
iOS takes user permissions seriously. You have to explicitly request permission from the user to receive push notifications. This applies to native and progressive web apps (PWAs). iOS devices require explicit user permission to receive push notifications, and integrating FCM and APNs is crucial for handling these notifications effectively.
For almost a whole month now (since iOS 16.5) Apple has been quietly supporting web push notifications, meaning that it pays now more than ever to turn your website into a Progressive Web Application (PWA). Here’s how to get started👇
— Matthew Oxley (@Matt0xley) June 14, 2023
This is typically done when the app first launches or the user performs an action requiring notifications. Use this Swift code to create the notification request message:
// Request notification permissions
UNUserNotificationCenter.current().requestAuthorization(options: [.alert, .sound, .badge]) { granted, error in
    if granted {
        // User granted permission, register for remote notifications
        RegistrationServices.shared.registerForRemoteNotifications()
    } else {
        // User denied permission
    }
}
This code requests permission to display alerts, play sounds, and update the app badge. If the user grants permission, you can register for remote notifications. You only get one chance to request permission, so explaining the value of notifications to the user before making the request is important.
Fortunately, you have a little more leeway with Android devices. Starting with Android 13, you must explicitly request the POST_NOTIFICATIONS runtime permission to display notifications. This can be done using the EssentialPermissions plugin in .NET MAUI:
// Request notification permission
var permissionStatus = await Permissions.RequestAsync<Permissions.Notification>();
if (permissionStatus == PermissionStatus.Granted)
{
    // User granted permission
}
else
{
    // User denied permission
}
This process gives you two chances to request permission before the user is permanently denied. Previously, you didn’t need to request notifications for devices running Android 12 and lower. However, today, devices running Android 13 and higher also require explicit permission.
Step 9: Test Notifications
It’s a best practice to test push notifications once you set them up. This ensures the notifications send at the right time and display correctly across all devices. Additionally, testing incoming push notifications is crucial to ensure they display correctly across all devices.
To test your setup:
- Check that Firebase is properly configured for your React Native project. This includes setting up Firebase Cloud Messaging (FCM) and adding necessary configurations in AndroidManifest.xml for Android and AppDelegate.m for iOS.
- Use real iOS and Android devices to get a more accurate idea of what your notifications will look like on the user side. Test on multiple screen sizes, if possible, as well as multiple versions of iOS and Android.
- See how the notifications display when the app is in the foreground or background.
- Test notification delivery for different network conditions, like wifi or 4G.
- Simulate real error conditions to see how your app handles failures. It’s a good idea to set up logging to capture user data for debugging.
While in-house testing is important, don’t discount the value of user feedback and crash reports. This will help you identify any issues that your team missed during testing.
You can also test your push notifications using our TestFCM tool. If you’re creating web push notifications, test them out at webpushtest.com, which demos standards based web push notifications across all platforms, including iOS.
Handling Push Notifications
Handling push notifications in a React Native app involves several steps, from receiving the notification to displaying it to the user. Whether you’re dealing with remote push notifications or local notifications, the process requires careful implementation to ensure a seamless user experience.
Performance and Optimization Tips

Push notifications
Even if you set up React Native push notifications correctly, there’s always room for improvement. Follow these performance and optimization best practices to continually improve your development processes and the user experience.
Optimizing the notification payload is crucial to ensure efficient delivery and display of notifications, as it directly impacts how well notifications reach users on both Android and iOS devices.
Plan For High-Volume Campaigns
Will your app send lots of notifications? That can add up to performance issues at scale. Follow these tips to handle notifications more efficiently:
- Clean up your code: Have a few team members look over your code and see if there are areas you can simplify. Avoid heavy computations in the handling logic and keep it as simple as possible.
- Use background processing: If you need to execute tasks when a user receives notifications, use background processing tools. It's also important to handle notifications when the app is in a quit state to ensure efficient resource management.
- Set up rate limits: You don’t want to overwhelm users. Set rate limits to avoid sending too many notifications over a certain period of time.
Boost User Engagement
Push notifications are a smart way to increase user adoption, but they can also be annoying or intrusive. The key is to deliver valuable information without overwhelming users. You can boost engagement by:
- Including a single call to action (CTA) in each notification to avoid splitting users’ attention.
- Using images, videos, sounds, or other rich media—all while being mindful of network constraints.
- Personalizing push notifications by adding the user’s name.
- Using deep linking to take users directly to content within your app. Managing notification clicks is crucial to direct users to specific screens within the app, enhancing their experience and engagement.
Monitor Push Notification Analytics
Tracking push notification performance will help you understand user engagement and improve future campaigns. Integrating Firebase with Google Analytics is an easy way to gather this data, although you’ll need to regularly log into Google Analytics to assess notification performance.
Follow these tips to make the most of your performance data:
- Track key metrics like delivery rates, opens, click-through rates (CTR), retention rates, and conversions. Tracking the message ID is crucial for monitoring the delivery and status of notifications.
- See how notifications perform based on different targets or customer segments.
- Track the user’s journey post-notification to see how users interact with your app after receiving each notification.
Invest in Accessibility
Most push notifications overlook accessibility, severely limiting the experience of users with disabilities. Follow these best practices to make your push notifications as accessible as possible:
- Use clear, concise language. Try to write notifications at a sixth-grade reading level or lower.
- Ensure your notifications are compatible with screen readers like VoiceOver for iOS and TalkBack for Android. Consider user interactions when designing accessible push notifications to enhance engagement and facilitate responses.
- Allow users to change the notification text size to boost visibility.
- Include sound or vibration options for all notifications.
- Use high-contrast colors and layouts to improve readability.
Keep up With Trends
Like any technology, both Firebase and the React Native platform will change over time. It’s crucial for businesses and developers to keep on top of these developments to create the most streamlined push notifications possible:
- Hyper-targeted messaging: Firebase is currently improving its targeting abilities, which would allow it to be more granular with user personalization and messaging. Context is key to engagement and retention, so targeting updates could have a huge impact on revenue. Remote push notifications are sent from a remote server through services such as Firebase Cloud Messaging (FCM) and Apple Push Notifications (APN), highlighting the process involved in queuing and delivering these notifications to users' devices.
- Interactive features: Firebase currently allows you to add interactive features to messages, but it will continue refining these features. Firebase and React Native libraries like Notifee make it easier to create interactive notifications with buttons, inputs, and custom UI.
- Channel options: There’s no shortage of communication and notification channels. Android and iOS are introducing notification channels and categories to help users better manage and prioritize notifications from different apps and topics. Firebase and React Native libraries are adapting to support these new platform features for improved organization.
- Integrated testing: Firebase is expanding its analytics capabilities for push notifications, allowing developers to track metrics like open rates, conversions, and more. A/B testing features will help optimize notification content and timing.
- Automation: AI is making it much easier to schedule notifications, write copy, and more. Look for automation tools that can schedule notifications based on time, location, user behavior triggers, and other contextual signals.
Push Notification Success Stories
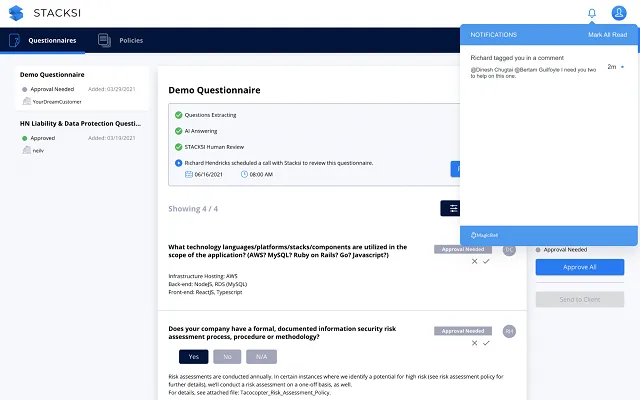
Stacksi
Implementing push notifications is simple, thanks in large part to solutions like React Native and Firebase. Regardless of how you implement push notifications, they're a powerful tool for engaging users.
For example, STACKSI needed a sophisticated in-platform notification system to facilitate real-time, asynchronous collaboration and ensure an efficient, user-friendly workflow. They turned to MagicBell for its affordability, immediate integration, and customization features, enabling them to provide more specific notifications and helpful information within notifications when needed.
Luminovo also switched to push notifications for its software-as-a-service (SaaS) business. They use the backend admin board to compose custom notifications without complex coding or logic, saving time while giving customers a better experience.
What Next?
After implementing push notifications, engage users by giving them an option to access their notifications in an inbox. An inbox gives users a safe place to store and access their messages at any time.
React Native Firebase Messaging offers robust capabilities for managing push notifications, including presenting notifications in foreground apps, handling background notifications, and managing user permissions.
It also reduces the need for repeat notifications, which have the potential to hurt the user experience. Whether it’s an Android or an iOS device, the research shows that users want to re-engage with their notifications whenever it suits them.
There’s no need to write custom code for this, either. Use to implement customized inbox functionality in your application in a few minutes. We use API and UI components for multi-channel, real-time delivery across apps, emails, Slack, mobile, web, and more.
Build your user inbox for free: Create a MagicBell account now
Conclusion
Implementing push notifications in a React Native app using Firebase is a powerful way to engage users and keep them informed. By following the steps outlined in this guide, you can set up and manage both remote push notifications and local notifications, ensuring a seamless and effective notification strategy.
Firebase Cloud Messaging (FCM) simplifies the process of sending and receiving notifications, allowing you to focus on creating valuable content for your users. Whether you’re sending notifications to remind users about new content, updates, or in-app events, push notifications are an essential tool for maintaining user engagement.
As you continue to develop your app, remember to test your notifications thoroughly, monitor their performance, and optimize your notification strategy based on user feedback and analytics. By doing so, you can create a more engaging and user-friendly experience that keeps users coming back to your app.
With the knowledge and tools provided in this guide, you’re well-equipped to implement and manage push notifications in your React Native app. Happy coding!
Frequently Asked Questions
Can you do push notifications with React Native?
Yes. Reactive Native provides ready-made tools and libraries to integrate push notifications for both iOS and Android devices.
Devices can be automatically registered to receive remote messages via Firebase Messaging, which simplifies the process of managing push notifications.
How do you implement local push notifications in React Native?
Use libraries like react-native-push-notification to schedule and display local notifications. Displaying local notifications can significantly enhance user engagement by allowing developers to send timely updates directly to users' devices. Install the library, configure it to your React Native project, and use the library’s API to schedule and manage all local notifications.
What types of notifications does React Native have?
React Native supports two types of notifications:
- Local: Local notifications are scheduled from within the app. They’re helpful for in-app events, reminders, and updates.
- Remote: These are also known as push notifications. Remote notifications are sent from a server to the user’s device, usually to remind the user about content from outside the app.
Correctly parsing notification data is crucial for managing foreground messages, ensuring that applications handle user notifications based on the received payload.
How can you use push notifications in React Native without Firebase?
Firebase is one of the easiest ways to implement push notifications, but it isn't your only option. You can use other backend services like MagicBell or make your own server. Server-device communication plays a crucial role in managing push notifications, enabling seamless interaction between servers and devices. Once you choose a service, you'll need to integrate with that service's SDK or API and configure your React Native app to manage push notifications.
